Wednesday, May 29, 2019

Even The Simple Things - Post-It Sticky Notes

Lots Of Places To Put A Note!
    Even when I was younger, I would forget things. Maybe because my brain runs at 90 MPH all the time, I lose track of some things. Perhaps as I get older (Not OLD!) it's getting worse. I'm not so sure about that, but you never know. If it gets bad enough, I could hide my own Easter eggs! Thankfully, I'm not quite at that point yet. I have taken to writing short notes to myself so I remember to do something. We've all been there. RV all loaded, get in the driver's seat and go off down the road...a few minutes later you remember something you forgot to take with you! Don't be shy....we've ALL done it at least once. A long time ago some smart guy invented the Post-It note. It was just a little pad of paper with a tacky glue strip along one end that you could stick and re-stick to many surfaces without damaging them. Perfect for short notes! You can use them for all kinds of things. I do.

So Many Sizes And Colors!
Of course, the most obvious in our case, is making a list of items to take with you or do before you leave on your RV adventure. "Make sure home Oven is off" comes to mind. Whenever I begin a project that requires a bunch of tools and parts from various places, I make a short list. This way I don't get ready to work on something and have a bit missing or forget a tool that's across the street, buried in a toolbox I don't regularly use (or maybe it's not there to start with!) They are great for recipes. I put down what I am missing to prepare a particular recipe and make sure I stick it by the door. This way, when I stop at a Walmart or shopping center with a supermarket, I just grab the note and go shopping. Nothing worse than beginning to cook and realizing a primary ingredient is missing! Especially when Boondocking away from civilization!

A Giant Sticky Note Mounting Board!
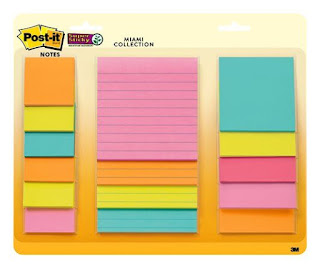
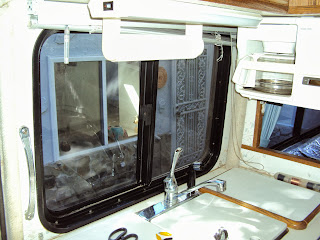
Fixing stuff can be easy....what if you begin a job and realize you need some additional hardware? Write it down and THEN go to the store. This way, you may only have to make one trip. Don't ask me how I know this... How often have you thought to yourself, I'll remember what I need, it's only a few items?" Part numbers! Who is going to remember the exact part numbers for a mechanical project? I find these little squares (or rectangles) of paper to be a god-send. They come in all colors and sizes. I am sure you'll find one you like. I have a small square purple pad on my desk. I use it all the time. They stick great to RV windows, so kitchen lists go there. I found if I stick them to the fridge, I always end up bumping them to the floor.... Then what?

Believe me, the first time one of these little notes saves you a trip back to the house or the store, you'll be grateful you have it! Oh, by the way...make sure you have a pen too!

Be Seeing You...Down The Road,

Rich "The Wanderman"
www.thewanderman.com

Wednesday, May 22, 2019

Even The Simple Things - Cutting Grease And Oil While Cleaning Your RV...Or YOU!

Clean-up Time
     As I have said MANY times in the past, I hate cleaning. Of course, everything I LIKE doing usually ends in a clean-up. Cooking, working on my RV's mechanical bits, modifying my RV's house systems...well, you get the idea. Pretty much anything fun is going to require some kind of cleanup afterwards. (If it's fun, it's probably illegal, immoral or, at the very least, fattening!)

I have tried many cleaners for all sorts of jobs. Some work great on one thing but not another. Some will damage certain surfaces, some are just hard to use. Whenever I get my hands dirty I always end up going back to the basics -- Dawn dishwashing liquid. I know...it's a "name" brand, but when I can buy small containers at a dollar store for...umm.. a dollar, that's OK. This stuff cuts through grease and oil, better than anything else I have tried that doesn't strip paint and irritate skin as well.

Now I am not going to wax poetic about the product. It works, 'nuff said. But I am always astounded by how many things I can use it on. Need to wash your RV? Get all the waxy buildup off? Mix some into your wash pail. Just remember to re-wax afterwards! Well, unless you use an acrylic floor finish instead, I do! Need to wash some dishes without filling up the sink? Put some in a spray bottle mixed with water. Spray the dishes, utensils, etc., and then wipe and rinse. Works great, saves water! Now that's a bonus. How about greasy, engine grime soaked hands? Use it straight up...add a tiny bit of water and scrub off the dissolving dirt.

So many things can be done...so many things cleaned. It's a true RV multi-tasker. (You're Soaking in it! For my older friends.)

Of course, it will NOT work on everything. You can only play with the concentration so much. It's a gentle cleanser after all. No abrasives in it at all. That's part of its charm. if I need abrasives I'll use a powdered cleanser. I did that a few times to get greasy engine dirt off my hands and while it worked, I definitely took some skin with it! Just about the only thing you can't use it for is drinking! Yes, that's a joke. It would be bad if you tried. If you feel you must wash out someone's mouth with soap, might I suggest Ivory as an alternative!? What else? Works great on RV plastics too!


Try it....I always have a couple of bottles around for whatever I need to clean. It works. So many things these days just...don't. Nice that some do.

Be Seeing You...Down The Road,

Rich "The Wanderman"

www.thewanderman.com

Wednesday, May 15, 2019

How To Build A Flying Ornithopter - A What??

    Yes, you read that correctly. An Ornithopter. It's a flying machine that flaps its wings to create lift and achieve flight. Rumor has it the first Ornithopters were put together in the 12th Century. However, the first real documented flight of a device that flew with the "flapping motion of a bird" was attributed to a bunch of French guys in the 1870s. The one I found is based upon a design from 1884. I stumbled upon it while shopping at a liquidator store. (Where else?) Turns out there are quite a few of these to be had at quite reasonable prices. When I purchased it, there was a doubt in my mind as to whether it would actually fly at all. After a bit of a tedious assembly process, I wound it up and....it flew! Really, it did. It's the perfect rainy day RV time killer. And fun too.

The model I found is made by a company called, NPW. With a tiny bit of searching, they can be had for as little as 3.99 per kit. It includes the wooden pieces, plastic for the wings and tail, tape to attach everything together, the drive system and a tiny metal crank. It doesn't look like much before it's assembled, but, believe me, it goes together and looks cool when finished. I have to admit, getting the incredibly skinny tape lined up and stuck down to the wings and tail surfaces and the wooden pieces was a challenge. But it will all fit together properly with a bit of finagling! Once complete, wind it up just a bit and make sure it's solid and will flap its wings properly. I really enjoy things that fly. Heck, I even braved a snow and ice storm/blizzard to pick up a flying machine.

Ready To Fly!
Next step is to get it in the air. Depending on the size of your RV (and whether you have deep slides!) you may be able to try it out inside. It can be set up to do a couple of lazy circles about 6 feet around, or straight for about 15 feet. Well, that was the best I could do. I was just amazed that it flew at all! Very cool to watch it flap its wings to stay aloft. As a side note, I did see some of these online that were actually bird shaped, but I liked this one better. Made me feel like Leonardo DaVinci! The instructions said to wind the rubber band two knots over, but I couldn't get it to flap more than a couple of times until I wound it to the triple knot position. then it FLEW! Nicely!

If you find yourself stuck inside (and maybe have kids or grandkids with you), these small and easily storable kits may be just the ticket.

Be Seeing You...Down The Road,

Rich "The Wanderman"

www.thewanderman.com

Tuesday, May 7, 2019

The Easiest Way To Adjust Your Engine Belts!

    I have a slipping power steering belt. After replacing my power steering pump last year, we found that the only way to adjust the tension is to have two people underneath the RV. One with a REALLY long pry bar and the other with two wrenches to tighten the bolts. This is not ideal. Because of the positioning of the pulleys and exhaust pipes it is almost impossible to get the correct tension. That's why it squeals when under heavy load. This is really bad for the belt and pulley. It will wear prematurely and may snap at a most inopportune time! I went looking for a better, less muscle-intensive solution and managed to actually find one that works!

It's got the grand name of, "Belt Tension Jack," but really it's a simple piece of equipment that works very well on MANY sizes of belts and pulleys. It's made up of two slender, slightly curved pieces that will fit in (or on) the inside of the pulley's rim and a solid piece that goes to a hexagonal adjuster bolt. There are several different length extensions you can add or subtract to get the correct fit. The whole thing is made from chrome plated steel and is decently constructed. Not perfect, but serviceable. It can be found online for less than $20.00 and doesn't take up much storage space.

Typical Use
It's pretty easy to use. Loosen the bolts that allow the belt to be tensioned. Usually it's one in a slot and another just in a hole to lock it down. Just figure out the distance between the two pulleys you are trying to adjust the belt on, insert the correct adapter (or none for short distances) and place the curved ends into the pulley grooves. Hand tighten till it stays put. Then get a 1/2" wrench and begin turning the adjuster until the belt is properly tightened. Make sure to get the factory tension specs as over-tightening is just as bad as under-tightening. Over-tightening could cause damage to the bearings in the pulleys or the device it's driving, like a power steering pump or alternator. Once tensioned, simply tighten the bolts on the adjuster and loosen the tension jack to remove. Done.

It's really easy to use and makes it a snap to make sure you have correctly tensioned belts. MUCH easier to put a belt on this way when you are having a roadside emergency due to a broken belt! Believe me, I know!

Be Seeing You...Down the Road,

Rich "The Wanderman"

www.thewanderman.com

Wednesday, May 1, 2019

Cleaning Narrow Necked Containers Easily - Great For Thermal Coffee Carafes!

    As everyone already knows...I like my coffee. Especially in the morning. When not traveling, I use a large thermal carafe (pot) so it's stays hot over a long period of time. The problem is, it has a small neck and is very difficult to clean. I've tried many brushes and sponge attachments, but they just didn't have the strength to really clean out the bottom of the pot. And everyone knows, one of the secrets to great coffee is a clean pot! I was browsing around the other day in a large housewares shop and came across a hybrid sponge/bristle brush that had the right idea. So I bought it. Did it work? Read on!

First off, it's built quite well. It has a large-ish handle for a good grip and stiff bristles. At the bottom is a "sea anemone" shaped sponge doo-hicky. Is that the correct term, doo-hicky? Anyway, it would fit down the tight opening and appeared to be able to take a fair amount of scrubbing force. If you press down vertically, the sponges are compressed enough that the bristles clean the residue off the bottom quite nicely. A good swirl while inside, with hot water and soap of course, will make short work of anything left inside. I haven't seen the inside of my aluminum carafe look this good since it was new! And all for only $3.99.

Once done, it simply rinses off under hot water, though you could put it in the dishwasher as well. So, how about having on on board the RV? I do have some small necked containers that would be a breeze to clean in my galley, so that's a plus. It also works nicely on tall glasses that you cannot get your hand deep enough to really clean the bottom. You could replace one of your other sink tools with this because it will do pretty much everything a regular brush will. The bristles are nylon and the "stem" is a solid but flexible plastic. No metal to rust in your sink. I leave my tools on one side of the double sink with the cover on when traveling, so that's a bonus.

As always it comes down to space available and personal preference. I absolutely will keep one at home, but the jury is still out about bringing one along. I suppose, after a trip I could always bring stuff home to clean...and everyone knows I hate cleaning!


Be Seeing You...Down The Road,

Rich "The Wanderman"
www.thewanderman.com