Thursday, July 26, 2012

Keep Your Fridge Cooler And More Efficient - Clean The Burner!

Refrigerator Hatch
    Lately, I have been trying to get the best efficiency I can from my RV fridge. I've added a supplemental fan, checked all the seals, fixed the chimney baffle and added a remote temperature display. I really should have started with simple cleaning! It's not hard to do, and can pay off quite nicely. I've also made removable thermal insulation to fit all my windows. I probably should have started with basic cleaning and maintenance, but hind sight is always 20-20!

Most RV refrigerators are either "2 Way," meaning they run on Propane or 110V AC Electric (Generator or Shore power supplied) or "3 Way" which ads 12V DC to the mix. Yes, I know there are other definitions of 3-way, get you minds out of the gutter!

Behind The Lower Vent Door
Begin by shutting off the power to the refrigerator! Then locate and open your lower outside refrigerator vent. These usually have a simple twist latch and hinge at the top. If you're lucky, you can get it to stay in the up position without dropping every 30 seconds onto your head while working on the fridge. Mine, well... didn't. Once open, you'll see a bunch of wiring for the fridge (and maybe other things) the lower half of the refrigerators cooling system and a cover plate over the propane burner assembly. This is usually held in place with 2 or more Philips head screws. Next thing to do is remove the screws and gently lift up and slide out the cover.

Chimney, Wiring with Burner Cover In Place 
Underneath, is the base of the burner chimney, wiring for the thermistor that senses whether the flame is on or off, the gas line(s) and finally the burner itself.  These will likely be covered by a sheet metal "box" that protects the components. Mine simply pulled straight out. Remove it and put it aside.
 ***NOTE: Remember how it came out!***
If you have a self igniting model, you will also see the spark (piezo) igniter and its' wiring. Now is a good time to take a close look at the wiring and make sure it isn't frayed or melted or even hanging loose after coming apart at the connectors! Repair whatever is broken.

Burner, Igniter And Sensor Assembly
Take a close look at the end of the burner itself. It will be a rounded cylinder with several "gaps" running across it at the end. This is where the propane gas burns to create the heat that will ultimately cool your fridge. Sitting on top of this, in the path of the flame, is the thin stiff wire that heats up and tells the control board there is a flame present. If this isn't working, it can easily shut down your fridge for safety's sake. The refrigerator will still work on electric, so you may be able to keep your provisions cold. Next, blow out any dirt or debris from in and around the burner with low pressure compressed air. Too high a pressure could damage it! I applied a can of compressed air like the photographers use.. Then blow out the junk hiding in the chimney above the burner. You may find a few 8 legged critters have moved in, especially if you have had a propane leak. For some reason spiders LOVE the smell of propane. Not me...I mean it is DESIGNED to smell bad, so you know it's around. Without the special additive it would be odorless. Imagine trying to figure out you had an accidental leak. I shudder to think how bad that could be. But it isn't. Propane smells BAD! It will let you know it's around.

Proper Flame Operation
Once the system is clean, move everything out of the way of the burner and chimney and set the refrigerator control panel to LP or Gas mode. Mine only has AUTO and LP so I switched it to LP. You should hear the flame come on. If it doesn't start and you are SURE you have electric ignition, the refrigerator control system will try to light it a couple of additional times. If you still have no luck, check the obvious things first. Do you have propane in the tank? Is the main or tank gas valve actually on? Once you get it lit, go back outside and look at the flame coming out of the burner. Does it have a deep blue color? Does it have a distinct shape coming out of the gaps in the burner? Almost like "fingers?" The red/yellow hot spots are where the sensors intersect with the flame and glow red hot. This is normal and needed for proper operation. When you are satisfied that everything is working properly, go and turn off the refrigerator. Come back out and confirm the flame is out.

LET IT COOL OFF!!!

Slide the cover back on the burner assembly and then screw the cover plate back over everything. You're good to go. You may not have fixed anything. In fact, it all could have been perfect to begin with, but it's a good idea to check this at least once a year. Especially if you winterize and store your RV for the cold months.

Be Seeing You...Down The Road,

Rich "The Wanderman"
www.thewanderman.com


Thursday, July 19, 2012

More Cool Tips - Thermal Insulation for Your Windows...It Works!

    My last trip left me feeling hot and bothered. Hot, because...well because it was HOT! Bothered, because I had to run my generator to switch on the Air Conditioner so I could recover what was left of my sanity. Everything in an RV suffers when the temperature soars. Especially US! I really wanted to reduce the amount of heat getting in to the RV in the first place. I had some experience with reflective/bubblewrap mylar coated thin insulation (a common brand name is REFLECTIX.) This stuff is amazing! I wanted something I could custom cut and install on all my windows. As some of you know, I have A LOT of windows. It's one of the things I like about my RV. Well, except for the solar oven it can create inside. Here's how you can make these custom covers for very little money and even less labor.

First, measure all your windows both horizontal and vertical. Then add that all up and figure out how many feet you'll need of the material. I like the 4 foot by 25 foot roll. That should cover all the windows installed in most RVs. You'll also need a roll of DUCT tape. Yes, I know there's a brand of duct tape called "Duck" tape, but really...it's for DUCTwork. The kind used to move air around for heating and cooling. For some reason, somewhere along the line, it became simply duck tape. Anyway, by some...any brand is OK. I liked the standard silver/gray color as it comes close to the gray used on my interior. This stuff will be used to create a border around each cut piece of insulation. It will also slightly stiffen the edges so you get a good fit and they will hold themselves up.

Long Cut Piece for The Over the Table Window

Now that you've measured, cut the pieces for each window. If you get lucky (or a are a REALLY great planner!) you can maximize the use of the roll and get it done without much waste. Maybe you...not me!

Cut Rounded Edge
Now, depending on the style of windows you have, you'll likely need to trim the corners. Mine were rounded. I made a template with a piece of cardboard (an old shoe box lid, to be exact) and then used that to cut each corner. I didn't confirm that all the corners matched, but I am SURE you will beforehand. Right? The cutting was done using those nifty "miracle" scissors. the kind EMS/Ambulance workers carry. I once cut a penny in half with one! Amazing. Oh, don't try that at home. The Federal Government gets mad when you butcher money, even small change.

Once they are all cut, begin taping the edges. I rolled the tape out on the table and had a friend hold it down while we placed each edge HALFWAY onto the tape. Then pressed it down and folded over the remaining tape to make a sealed edge. Once all four sides of each one where done we moved on to the corners. Not so easy. I know you're supposed to cut some slits on either side so it will overlap evenly. For the life of me I couldn't get a single corner right. I just overlay-ed some additional tape for each corner. I made them a bit heavier and figured it would be a bit thicker so they will hold on to the window frame edges better. Seemed like that should work.
(*NOTE:It did!)

Once complete, you'll have great window insulators that are easy to store, can be folded AND fit nicely on each of YOUR windows. All this, for a lot less money than a custom set would cost. I believe these should last a long time. They are inside and flexible enough to take some abuse. Having a bit of duct tape on hand for repairs (if needed) would probably be a good idea.

While all of this was out on the table I figured I would cut some square pieces to put under the Velcro tabbed roof vent covers. They're only cloth, and I can see sunlight through them. You could also feel the heat coming in AND it was beginning to fade a bit in a circular pattern to match the fan opening.
I cut one for the front and one for the back. 


After two days in the sun in 93 degree temperatures, my interior never got above 88 degrees. All WITHOUT a fan running. Color me impressed.

I have to say, they look pretty cool from the outside as well. Very "Science Fiction-ny." The only downside I have found is that it is REALLY dark when I go inside when they are all installed. I guess that's what they're supposed to do, so I cannot be surprised!

Galley Window
Table Window
I took a few photos of them from the outside. All in all this was a good modification /upgrade that serves a useful purpose and looks pretty cool. Well, at least to me it does! It WILL protect your interior from heat and harmful UV radiation from the sun. No one likes a faded interior.

Be Seeing You...Down The Road,

Rich "The Wanderman"
www.thewanderman.com


Thursday, July 12, 2012

Do You Like Your Drinks COLD? - Installing a Fridge Chimney Fan.


Not Quite Cold Enough
    On my last trip it was over 90 degrees out (Farenheit, if it were Celsius I'd be cooked!)  I love cold drinks, the colder the better. My RV fridge was struggling to maintain 48 degrees in the fridge compartment and the freezer was edging up past 20 degrees. Mostly because I was parked, the only way I could, with the wall where the fridge was is in direct sun most of the day. I had looked into a supplemental fan, mounted in the chimney, below the roof exhaust vent last year. Now I knew I had to install one. This isn't really difficult to do, but can really make a difference in hot weather

120MM 12 Volt "Muffin" Fan
All RV absorption fridges use convection to transfer heat up and away from the interior. It's really an elegant way of making cold from heat. The manufacturer will set specifications that show the space needed around the fridge during an install. On mine, the space behind the fridge is quite large, so a fan will help create an air current to move the hot air up and out the existing roof vent.

To get the air moving I used a computer style "muffin" fan. It's about 4" across and draws around 1/2 Amp at full speed. These are commonly available online and from local retailers. They aren't expensive at all. Mine was 7 dollars including shipping. I thought I would need some kind of bracket, but my 1"+ roof plywood and the small holes in the corner of the fan surround were sufficient to mount the fan above the fins and below the vent.

Roof Vent Off (Wires are from Solar Panels)
Shut off the fridge! Gather all the tools you think you'll need. I'm sure (like me) you will be going up and down the ladder a whole bunch of times to get things you forgot. Better yet, get someone to help!
Next remove the screws holding the fridge vent on. Remove the vent and put it aside. Preferably somewhere it won't fall off the roof. Remove (carefully!) the mesh vent cover. These are designed to keep critters out. Do they really work? It will bend easily so put it aside.You may also have a thin  metal plate above the cooling unit. This is a baffle to re-direct the airflow up and out. Mine was bent everywhere! I straightened it as best I could and made sure the air path to the vent was clear.

Now we figure out where you want to locate the fan.

Close Up of Opening Showing Cooling Fins
Look closely inside the vent opening. Do you see the cooling unit for the fridge? It's the metal tubing with square fins surrounding it. The top is where heat is removed from the system.

 I put mine mostly over the fins on the cooling unit. I figure drawing air up through the chimney and across the fans will increase efficiency.

  MAKE SURE THE FAN EXHAUSTS UP!!!

Otherwise, you'll have to flip it over and start the mounting procedure again.


Fan Mounted, Wiring Done, Zip Tied, With Heat Shrink Tubing! 
I had some 2 conductor wire left over from another install. It was 20AWG...more than sufficient for a 1/2 Amp draw. I spliced this onto the fans "pigtails" and covered the splice with heat shrink tubing to make it more water resistant. (You thought I would forget that AGAIN, didn't you?Next I zip tied the splices and some wire to a convenient spot to avoid pulling on them when they were wired down below. Drop the wire in the chimney away from the cooling unit as best you can.

Climb down. (Again?)

Lower Fridge Vent Compartment.
Once back on the ground, open your lower fridge vent and make sure it isn't going to fall on you (over and over, bashing you on the head.) Find the 12 Volt ground and the Power block for the fridge. A cheap multi-meter that reads volts will be VERY helpful here, but you could just look at the diagram that MAY be attached to the plate covering the fridges innards. Attach the ground. I used the plate at the bottom of the fridge. There were quite a few wires using this as a ground already so I simply crimped on a ring style terminal and used an existing screw.


Giant Mystery Switch (Now Fan Control)
For the positive 12 volt line, I could have used the main power into the fridge or found a line from the fridge control board. If you use the one on the control board make sure it can supply the amperage you need. In either case install a fuse!! The control board method will turn on power to the fan every time the fridge is on. Not ideal.

Since I bought my RV there has been this HUGE toggle switch in the lower fridge vent that I couldn't figure out what it was for. Now I know. It was put there for me to attach the fridge fan power lead. OK, so I really have NO idea what it was for, but it works nicely for this application. After testing this for a while in the heat, I will likely hard wire power to the fridges main power block and out to a switch INSIDE to control the fan. You could buy a thermostatic switch to turn the fan on and off with temperature, but that's another article. For now, manual control is OK for me.

With a single day of testing, it appears that I have gone from 44.9 degrees down to 35.6 degrees in the main  fridge compartment, in the same outside conditions. The freezer is also down to 1 degree. I have the fridge set to a lower number on its control panel as well. It's set to 4 instead of 5. Only more testing will confirm the true value of this upgrade, but for now...I'm happy.

Be Seeing You...Down The Road,

Rich "The Wanderman"
www.thewanderman.com


Friday, July 6, 2012

It's Here! The First Real Trip of the Season!!

Clean and Ready to Go!
    Well, after some rapid deployment repairs and improvements I can finally get on the road for a "real" trip. Much as I'd like to go on much more extended journeys, short trips are it until I can retire. (If that ever happens!) A friend of mine has property near Lake George, New York that he has setup for boondocking. He has a toy hauler trailer and enjoys going there with his family. They've been gracious enough to invite me to stay for a few days with them. I'll get there on a Tuesday and leave Thursday afternoon. Then back to work on Friday night. Such is life. Two Nights, no shore hookup, lots of sun and good folks. Should be great! I'll test the current version of the Solar Charging System, the entertainment goodies I've installed and cook some gourmet style meals! Oh, did I mention he's Vegan. Have to come up with a recipe that he'll be able to eat...pasta primavera maybe?

We're off.....

Arrived about 30 minutes late since traffic NEVER cooperates with anyone. Everyone was sitting around the campfire watching the huge cast iron dutch oven bubble. My buddy wasn't the happiest camper as the gravel driveway he was counting on being finished...wasn't So we had to park on a high peaked, semi-compacted dirt driveway. Did I mention he had already gotten stuck backing his toy hauler trailer in??? Not an auspicious start. What was in the pot, you ask? A vegetarian mock beef stew concoction with fresh carrots potatoes some kind of soy "meat" and peas. I kid you not it was pretty good. They had baked some biscuits on top of the stew in the dutch oven. Very tasty. or maybe it was because I was ravenously hungry? Either way, I would have it again.

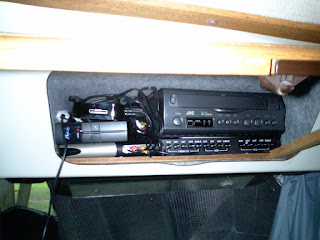
Video Gizmos. Yes, That's a VHS VCR!
We decided to watch a movie and I volunteered my latest gizmo, the digital media player I installed last week (see the article here) we watched a DVD I converted that has an RV theme...well sort of. It was called PAUL and stars Simon Pegg and Nick Frost as a couple of English RV enthusiasts who meet up with an Alien voiced by Seth Rogen. I highly recommend it for RV folks.

Thankfully, I filled my fuel tank just before I arrived since it was WAY too hot for 5 of us to sit in my small RV and watch a movie without air conditioning. The outside temp read 93 degrees! Ran the generator for a couple of hours, played the movie and stayed cool. I believe that RV's were created for this kind of social entertaining. Had snacks, cold drinks, comfort and a movie with good friends. Who could ask for anything more!

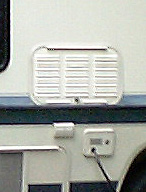
After the movie we retired to our respective "homes" and had an uneventful night. Well, except for the torrential downpours and occasional lightning and thunder. My only concerns....did my leak repairs work or would I be getting my morning shower early and would the dirt driveway disintegrate and slide us into the field beside it. Answers? No and No. Thanks for small miracles! In the morning my friends wife made corn meal pancakes and coffee....mmmmm... Then off to their beach with kayaks and lunch. Ate a grilled veggie burger. It was...OK. Still firmly in the beef camp on that one.

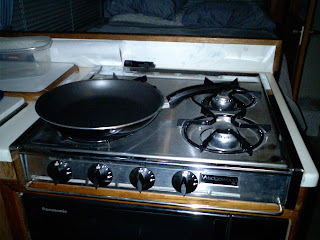
Why Don't They Make 4 Burner Stoves Anymore?
On a side note, if you (like me) don't spend a lot of time outside, it's a bad idea to spend all day at the beach, not drink enough water and get broiled by the sun. Thankfully I didn't burn, but I did dehydrate a bit and ended up with a nasty headache. Once back to the RV I went to the medicine cabinet and had some aspirin (well, Tylenol really) and turned the A/C on for a while. (Ain't RVs great!) After about a quart of cool water I was feeling well enough to cook. I had forgotten just how much, quantity wise, you have to chop up when serving 5 people! Vidalia and purple Onions, three colors of peppers, broccoli, cauliflower, peas (I know, I DIDN'T cut these!) and mushrooms. Sauteed it all in a garlic and oil wine sauce with parmesan, pepper, parsley and a few other "secret" ingredients. Boiled up some rotini and mixed it all together. Voila! A vegeterian dish. Of course, forgot I had brought Caesar salad fixin's but heck, no ones perfect.

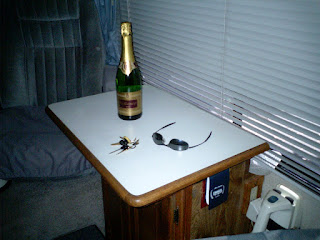
Here's to Good Friends!
Delivered it to their trailer (their turn to run the air conditioner/generator combo!) and we had a great meal with some great conversation. Then off to get some ice cream sundaes and watch the fireworks at Fort Ticonderoga, New York. Got a great spot even though it was beginning to rain again...the show went on and it was great! Their young daughter was especially entranced by the show. She is a sweetie!

Driving back in the pouring rain, we saw an older biker on the side of the road with his bike on it's side. Remember, in bad rain, the roads AND the visibility can make travel treacherous. We stopped and rendered assistance, getting his big cruiser motorcycle up on two wheels. The damage was mostly cosmetic (and maybe his pride as well?) and he was off down the road. We went back to the campsite and retired. Again torrential rains...same concerns....still OK. Yay!

Badly Framed Gauge Picture.
In the morning I helped them get packed up and hitched up. Most times I am glad I have a Class A. getting ready to go is much easier for me. Especially since I usually travel alone. My friend offered his campsite for me to stay an extra day, but we all decided to travel together most of the way back. Stopping for Iced Coffee (VERY important!) and at the outlet stores. yes, I know. rampant consumerism...but hey they had a Coleman's outlet AND a Kitchen store! Back on the road. Down the New York State Thruway with a final fuel stop in Kingston, New York where we split up. My transmission temps, even on long hills were around 200 degrees when I switched on the supplemental fan. Worked as advertised! Arrived home without further incident.

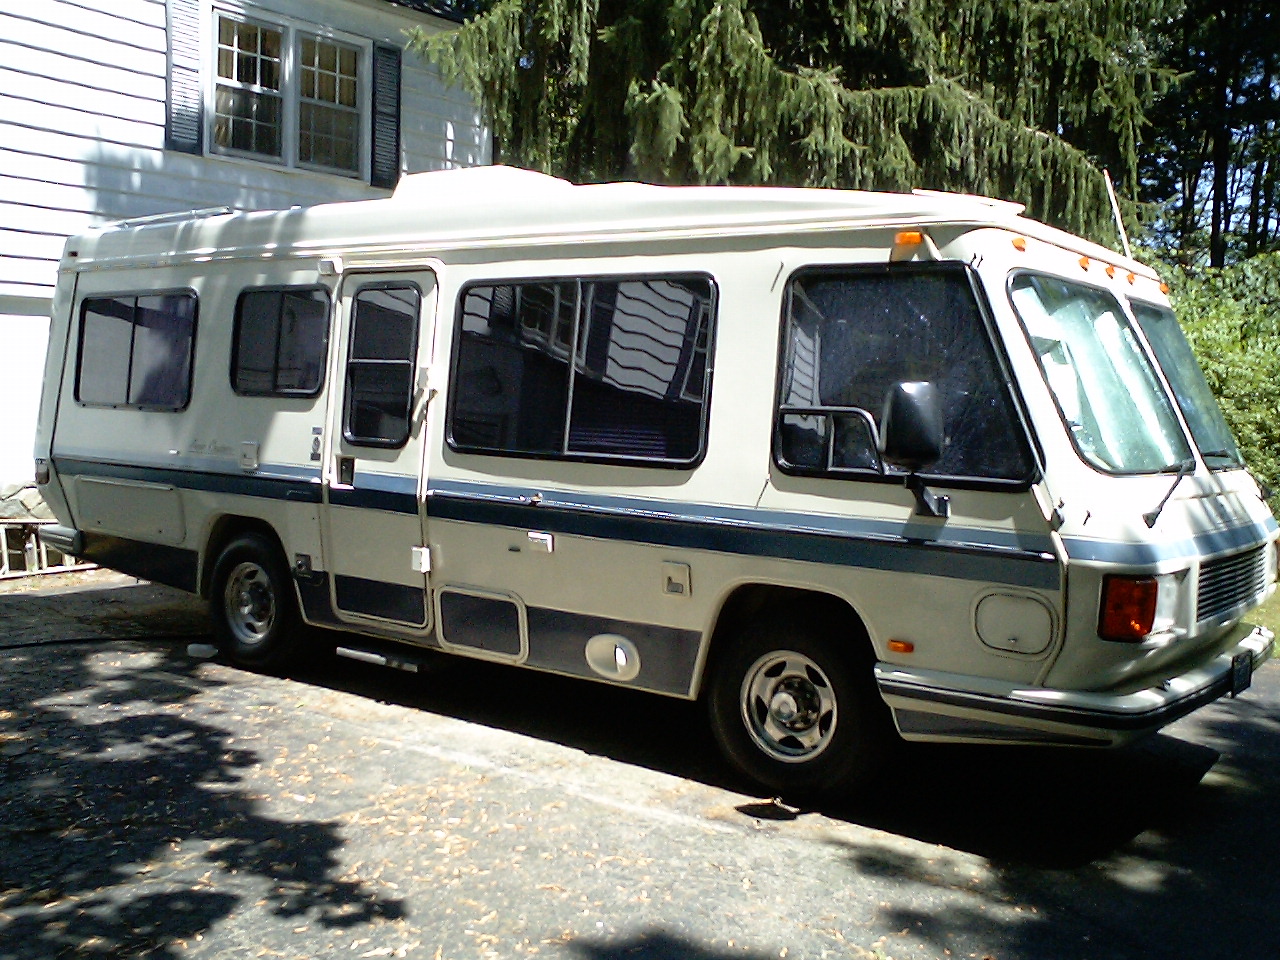
The ease of RV travel lends itself to short trips with friends. Spontaneity is a good thing! I love my RV and I'm sure you love yours as well. The best memories on made on the road!

Be Seeing You...Down The Road,

Rich "The Wanderman"
www.thewanderman.com