Wednesday, June 29, 2016

Even The Simple Things - Easy Grill Cleaning

My Awesome Grill!
    I hate cleaning. Everyone who reads these columns knows this. One of the nastiest jobs we do is cleaning up the grill after BBQ'ing something. Especially when there is sticky sauce involved! Well, I have been using a nice grill brush and some sprayed on water to clean the grill. But I have found a MUCH better way! How about steam? Steam cleans almost everything. And it cleans it very well. The main problem is where to get the steam from? Well, when cleaning a grill, that's easy! The grill stays hot for quite a while after you are done cooking. Why not use that heat to make your cleaning job easier? How? Read on!

A grill brush does a good job dislodging bigger chunks off your grill but it's a lot of work to really get the grates clean this way. A lot of people use the "wet towel on the grill" method. This works, but then you have a messy, hot (maybe burnt) towel to contend with. How about combining the two and having a grill brush that dispenses small amounts of water through the bristles that turns to steam and cleans the grill? Sounds like a great idea! It is!! I found a grill brush that does just that. Granted, it's got a plastic handle, but the rest is all metal. Even a fold-able hook. A nice touch? The hook locks into place when folded so it won't get in the way during use.


It has a small reservoir in the handle that you fill with water and a simple twist knob to turn the flow on and off. Just a quarter-turn does it. It has a removable set of brushes so they can be replaced with ease. All you need to do is unscrew the wing-nut holding the brush on. I especially liked the second skinny brush on top that lets you get in between the grill grates -- place that's normally tough to clean. After a full cleaning of my 200+ inch grill I'd only used about 1/3 of the water in the handle reservoir. So it should last through multiple cleanings.


I found this at a well-known bedding and bath shop for $9.99. Since I had a 20% off coupon it was only $8.00. So I figured it was worth a try. Glad I did! The simplest things can work miracles. With a little ingenuity, almost anything is possible.This little beauty has earned a place in my grilling "toolkit." Try it...you'll like it!

Be Seeing You...Down The Road,

Rich "The Wanderman"

www.thewanderman.com

Editor:  Here are some similar steam grill brushes at Amazon. And, as always, be sure there are no bristles left on the grill before you barbecue. They can be very hazardous!

Wednesday, June 22, 2016

Scotty, We Need More Power...Solar Power That Is! [Part 2]

New Install!
    Welcome to the second article in the series! In the first article I talked about replacing my existing semi-flexible, thin solar panels that are adhered to my RV roof, with the latest and greatest, most efficient panels now available. Last time we talked about how to get the old ones off and the new ones to stay up on the roof without resorting to screws or brackets. This time we'll look at the wiring. It's a bit more complex than the original wiring since there are six panels rather than three. Really, not all that difficult to make it all work, but required a bit of "fiddling." Let's take a look!


New Wiring Partially Fitted
 Typically, each solar panel has a junction box that takes the flat contacts from inside the panel itself and gives you terminals to attach wires to. My last two sets of panels had exactly that. Since I had already run duplex boat wire (That's just a fancy way to say it's two insulated wires within a UV and water resistant cover) I wanted to re-use those wires. Each of the original panels had a duplex wire run back to the charge controller. This time around two panels would have to share each run. I had to figure out how to make that happen. If you take a close look at the old junction boxes, they have 2 watertight screw down terminals for the wiring back to the charge controller from the roof. I had the duplex boat wire separated and inserted into these openings then crimped/soldered on two ring terminals that attached to the screw down terminals inside the junction box housing. Since the boxes were mounted on the panels and the wires from the panels themselves came up through the bottom of the box there wasn't anything left to do. The new panels have permanently attached junction boxes that are filled with waterproof epoxy. Even though the lid comes off, you can't access the terminals! So I couldn't simply run the wires the same way. Now what?

See The Second Section Of White Duplex Boat Wire
Well, the easiest and most efficient way to make this work was to remove and re-use the junction boxes from the original panels. This way I had a good solid waterproof connection from the roof to the charge controller inside already set up. Then I would wire each set of two panels into the junction box. These could be wired in series OR parallel. Huh? Simply put, if you wire from positive to negative (one panel to the other) and then one positive from 1 panel and 1 negative from the other into the junction box you get double the voltage at the same amperage. Just like putting two (or more) batteries in a flashlight, nose to tail.) The other way, parallel wiring connects both negatives and both positives together and then runs those into the charge controller. The Voltage remains the same, but the amperage doubles. Just like adding another 12V house battery will add more storage. Why does this matter? Which is best? It depends on your controller.

Finished Back Pair of Panels
In my case, I have an MPPT solar charge controller. This device is capable of taking in varying amounts of voltage (up to 105 Volts total) and converting it down to whatever your battery needs to charge. Around 12 to 15V usually. By increasing the voltage coming from the panels, you can reduce the thickness of the wires needed to transport that power without excessive losses. There is a point of diminishing returns though. The closer you are to the voltage needed to charge the batteries the more efficient the charger is. Let me put it this way; my two 12 Volt batteries are at 50%, the charger needs to put out around 14.7 volts to charge then dropping to 13.5 to "float" the batteries when charged. ("Float" just means keep them charged!) The closer to 14.7 V the panels are, the more efficient the controller is. MPPT controllers have a neat trick. They can take excess voltage and convert it to additional amps going into you batteries. Not a HUGE amount, mind you, but it could be 10% in hot weather and up to 25% in colder weather. With my new 600+ watts of panels, that could be an extra 60-150+ watts of power or around 5-15 additional amps. Almost like having a seventh panel! Result!
Watertight Wire "Hold Down" No Flapping In The Wind!
The only way I could make the wiring work with the old junction boxes was to drill 4 holes on the opposite side of the existing openings and insert the 2 negatives and two positives into the box. Then crimp/solder on ring terminals and screw them down to the terminals in the box. This works fine, but isn't all that pretty as I had to seal the small gaps around the new holes so water couldn't get in and corrode/short the wiring. A bit of silicone inside and outside and it should be fine. Then strips of EPDM tape to hold down the wires and tidy everything up. Next time(!) I will source different junction boxes. If I was to install this system on someone elses RV, I wouldn't have these issues as new installs are MUCH simpler and faster to do!

Of course, the wiring was done just as the sun was setting, so I have NO idea how well these new solar panels will perform. I would wager they will be MUCH better than the last set. I mean, technology marches on! If these panels test well, hopefully, I will get to test some Lithium Iron Phosphate batteries next. They are still quite expensive and no manufacturer of "plug-and play" 12V versions want to send me batteries to test. That is a red flag to me that they are "NOT ready for prime time." If you are a tech savvy experimenter they should work well enough, but if you just want it to work....maybe wait a bit longer.

Next week's article (Part 3) will put these new panels through their paces. Let's hope all is well and I am as enthusiastic about them AFTER the testing!

Be Seeing You...Down The Road,

Rich "The Wanderman"
www.thewanderman.com

Wednesday, June 15, 2016

Scotty, We Need More Power...Solar Power That Is! [Part 1]

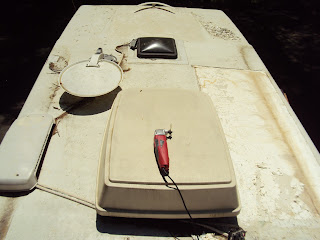
Second Generation Panels Removed. That's the Magic Tool!
    It's the 50th Anniversary of the debut of the original Star Trek TV Series. I remember watching it on a reclining chair with my Grandfather. Good times. I've been working on developing and improving a solar power charging system for RV's for quite some time. This will be the third generation of panels I have installed. But these are no "regular" solar panels, they are the latest available, approaching 22% efficiency and by virtue of that, reducing their size even more. I have a TINY roof. I need all the space I can get. Before I was forced to have custom built panels created for the specific space available on my roof...TWICE. This time, because of the significantly reduced measurements, I am can go with a stock size. This has really reduced the cost and (again) because of the small size, allowed me to increase the number of panels AND the power generated.

The new panels are rated at 100 Watts each, but I have found they actually average around 110-115 Watts each. The are semi-flexible like the last two sets, but are slightly thicker and use a different "sandwich" of materials. That will increase their longevity and makes it much easier to place them on the roof without cracking the individual wires and/or solar modules. The biggest change? No more very thin wires running across the front of each cell. Now the entire back surface of each cell is covered in a sheet of pure copper and then each cell is connected to its' neighbors with a flattened "dog bone" shaped link. This makes them MUCH more resistant to vibration. I believe the last set (hand made prototypes) had several of the small contact and feed wires break from the vibration on the road.

New In The Bag (Out Of The Box!)
They look different as well. The surface is a pure black with no lines at all. They are still NOT perfectly square so,  you still get some white space around each one, but it's OK visually. I'm really not all that concerned about what they look like as they are essentially invisible from the ground. Only if you climb the ladder can you see them at all. I am using the same 3M 760 Paralastic adhesive I used before as it has held up perfectly over multiple years with the other panels. So well, in fact, that removal was tough. I received some great advice about a power tool that made short work of the adhesive removal. Wish I knew about it before I was half-way done with the job! Ah well, hindsight is always 20/20! The panels also have 8 grommets around the outside edges (corners and long sides) that I am not using. In fact, on a few of the panels these will be trimmed off to allow me to mount them properly with adhesive.

Cleaning.  Prep Is Critical!
The installation on a "virgin" roof wouldn't take very long at all. I had to clean off all the old adhesive and clean my fiberglass roof very well first. That's a labor intensive job, not difficult...just took a long time. Th first step was pulling off the old panels. Using a sharp putty knife and lots of pulling power I managed to remove each panel in turn. Then I scraped the residual adhesive off with the putty knife (at least until I found out about that oscillating multi-tool!) This adhesive is designed to NOT come off unless you REALLY want it to, it's truth in advertising. Both of the old sets of panels  stayed put at greater than highway speeds (sometimes a lot greater!)


Trimmed Panel
Next step was placing the new panels temporarily in their spots and taping off the edges so I knew where to put the adhesive layer.. When had to modify several panels by cutting edges off to make sure the fit flat and weren't going to be shadowed by objects already on the RV roof.   I was able to easily cut them (well it was kind of easy) cutting them with a sheet rock knife and a long metal straight edge. You have to be very careful not to get too close to the black solar modules themselves and don't let the metal straight edge scratch the surface! I used the plastic bag the panels came wrapped in as a make-shift surface protector. You can get pretty close to the solar modules, I left 1/2" or so as a minimum.


Before we began placing the adhesive on the roof, we carefully removed any remaining residual with isopropyl alcohol. That also removed any oil and dirt from the area. It is critical to remove any residue as it may interfere with the adhesive sticking properly. Don;t forget to remove it from the back of the panel as well as the roof surface! Once that was done, two of use gently "hovered" the panel above it's taped spot on the roof and placed one corner then the next. Then the rest followed smoothly and gently to make sure we had no air bubbles and it wasn't crooked. You can move the panels a tiny bit once they are placed on the adhesive, but not for very long. It pays to be careful. Then sandbags are placed around the edges and somewhat into the center so the panel is held flat and in full contact with the adhesive. These are left for a couple of days to cure properly. It must remain above 55 degrees Fahrenheit!

I figure with a roof without panels about 45 minutes per panel once you figure out where they should go. Before, I was limited to 3 custom sized panels. The last set gave me around 500 Watts. I am now able to place 6 panels in about the same amount of space! Giving me around 640 Watts to play with. With an MPPT controller boosting the output (albeit slightly at 10% or so) I should now be able to fully charge my batteries on most days by 10AM based upon my average nightly usage.

Next week we will tackle the wiring of the new panels. It was a little different than the last two sets and a bit fiddly. Stay Tuned!

Be Seeing You...Down The Road,

Rich "The Wanderman"
www.thewanderman.com

Wednesday, June 8, 2016

The MOST Useful Power Tool I Have Found - No Kidding!

And So It Begins!
    I've gone and done it. I've begun the removal and installation of newer/better/more efficient solar panels to replace my last batch of prototypes. As that project gets finished and fully tested I will be writing one or more articles on the process. Suffice to say they are completely different than my last batch and should be WAY better. We shall see. That being said the first thing that had to be done is removal of the old panels from the roof. These are thin and flexible and are attached to the roof using a special paralastic adhesive (that just means it's strong like a construction adhesive, but elastic like a silicone.) I did the largest front panel first. Removing it with a putty knife and pulling it up a bit at a time. Once the panel was removed, I had LOTS of leftover adhesive stuck to my fiberglass roof. I began scraping it off with the putty knife, a bit at a time. Backbreaking and hand torturing labor. All done on the roof, in the sun. There HAD to be a better way! There was!

Not To Be Used In Autopsies!
I had told a friend of mine who works in construction the story about removing the first panel and how I have two more to go. He was surprised I used a putty knife and wanted to know why I hadn't just used an Oscillating Multi-Tool. A What? Oscillating Multi-Tool. Yep, I got the name right. Seems these things are quite popular now and can be had for under $20.00. What are they? If any of you remember a TV Show called "Quincy, M.E." back in the 80's there was a section of the opening scene where he holds up a surgical power tool that was designed to cut into a cadaver during an autopsy. We never see him use it, but the rookie cops watching all have various bad reactions! This tool is called a Stryker Autopsy Saw and is a very effective tool. The Multi-tools I am writing about are the great, great grandchildren of that stainless steel monster. They both work by moving the blade back and forth a tiny bit at a VERY high rate of speed (on mine that's adjustable) this has the effect of slicing through whatever you are trying to cut. Or in my case, scrape away.

Lots Of Blades!
There are MANY blade attachments for various jobs. The one I used was a wide scraper. It had a sharp edge without any serrations so it scraped the adhesive away smoothly in long strips. The jagged edged varieties are great for cutting (plunge cutting is a specialty.) Grinding blades are available as well as metal cutting.You can also attach a sanding block that takes all kinds of sandpaper triangles. You can cut or abrade or slice just about any material that you come across. Sometimes a little TOO easily. When scraping off the remaining adhesive, I had to be especially careful not to raise the tool too high. If I did, I risked cutting a slot into the roof fiberglass. It wasn't hard to control, but working carefully is always a good idea. Lots more attachments seem to pop up all the time. I am really liking the multiple use nature of this tool!

The best part? It was only $18.68 at Wally world! This is a 2.1 Amp/120V version. I prefer the plug in  variety to the battery powered ones. I don't think a single battery would have lasted through all my adhesive removal. The price included; a sanding block and triangular pads, a scraping tool and a cutting tool. Extra tools are available almost everywhere tools are sold and they are very inexpensive! I bought a 4 pack of scraping blades for $4.89. It's not all that large...maybe a tiny bit bigger than a standard Dremel. I keep both on-board my RV. That's most jobs done! Add a Drill/Driver (battery or AC) a good tool kit and there is almost nothing you can't accomplish!

Every so often I come across something that earns a permanent place on-board my RV. This one was a shoe-in!

Be Seeing You...Down The Road,

Rich "The Wanderman"
www.thewanderman.com

Wednesday, June 1, 2016

Incredibly Small, Incredibly Bright LED COB Lights!

See The Older Fog Lights IN The Lower Grill Opening?
    You know the old joke, "How can you tell when an electronics manufacturer is successful? They move to a SMALLER shop!" Well, it's true. As technology marches on, most devices become smaller and smaller, requiring less power and often provide increased performance. LEDs are a good example. First it was flashlights...then automotive/RV bulbs, then home bulbs. Recently I wanted to add some additional light to the front of my RV. Something like driving or fog lights. I wanted very low power consumption and easy to mount. I looked at all the available LED lights for cars and they were just too big to mount without some major surgery on my vehicle. I could have just mounted them UNDER the front bumper, but that's ugly and a bit too close to the ground for my taste. Then I stumbled upon these beauties. Amazing is a good description.

Tiny Magical Lights!
First, since I wasn't really sure they would even be marginally bright enough I didn't want to spend lots of money on a possible failure. But at only $6.00 for each pair (I've since seen them for less on most auction sites) they would work for just experimenting with the technology. Anyone familiar with LEDs remembers they used to be a single rounded end cylinder with power leads. You wanted more light, you had more little LEDs. Then came the SMD style. Those have little squares mounted in different configurations on different bulb bases. The more of the squares you had the brighter the light. Now comes the COB style. That stands for Chip On Board. There are no gaps and the entire flat area will light up. They can be any size or shape. The bigger they are, the more power they draw, the more light they produce. Simple. They are VERY efficient at producing light. The 9 Watts these use at 12 Volts creates a whopping 600 Lumens of light! A 55W Halogen light will produce 1400 Lumens by comparison. Since they are so small, you can mount MANY of these. I found that the 9W ones, one to a side, were plenty for fog light duty.

Only ONE Is Lit!
To install these, all you need is a 5/8" drill bit and some wiring connectors. They have a negative (can be attached to any convenient ground) and a positive, which will connect to a positive through a switch. For only 18W of power, a relay really isn't necessary. You could set it up to switch on with your other lights or ones you've already installed as extras or just add another tiny switch. Well, after you decide where you want them mounted (this took me the longest!) you drill the hole, remove the nut from the threaded bulb assembly, thread the wires through the hole and screw the nut on the back. Connect up the wiring and you are done! No brackets, no fuss.

These things are so useful (and easy to install) I am going to put a set on the back (and maybe sides too!) of the RV with separate switches to illuminate all sides so I can accomplish things in the dark. They are so inexpensive and useful, your imagination is really the only limit to their uses! Be Creative!

Be Seeing You...Down The Road,

Rich "The Wanderman"
www.thewanderman.com

Editor: Here's a link to some of these lights at Amazon.